Du arbeitest in einer Agentur? Dann kennst du das: Kein Projekt gleicht dem anderen. Es kann echt frustrierend sein, wenn Tools nicht die Flexibilität bieten, die du brauchst, um spezifische Anforderungen zu erfüllen. Mit Eigenen Feldern (aka Custom fields) in awork bist du bald maximal flexibel! Dieses Feature gibt dir die Superkraft, genau die Informationen zu erfassen, die für deine einzigartigen Projekte entscheidend sind – sei es ein detailliertes Budget, spezielles Kundenfeedback oder klare Prioritäten.
Aber das ist noch lange nicht alles! Weil eine Kugel Eis nie genug ist, haben wir uns im Custom-Ice-Release neben den Eigenen Feldern auch anderen heißen Themen aus der awork Community gewidmet. Freu dich auf coole Features, die dir schon heute deine Projektplanung verbessern und noch intuitiveres Arbeiten in awork ermöglichen. Dein Dashboard wird durch neue Anzeigeoptionen für das Aufgaben- und Abwesenheits-Widget noch individueller. Auch deine Vorlagen erhalten mehr Möglichkeiten, mit Inhalten und Details gefüllt zu werden. Entdecke alle Features und Verbesserungen in diesem Artikel.
[.b-important-block]Eigene Felder in awork werden schon bald für dich verfügbar sein! In wenigen Tagen werden sie für die ersten Workspaces freigeschaltet und dann Stück für Stück ausgerollt. Du erhältst eine weitere Info per Mail und in awork, wenn es soweit ist.[.b-important-block]
[$tag]Lass uns über Features sprechen![$tag]
In unserer awork Community besprechen wir alles rund um die neuen Features. Dort kannst du dich direkt mit unserem Produktmanager Lucas über sämtliche Themen austauschen.
Individualisiere deine Aufgaben mit Eigenen Feldern
Aufgaben bestehen aus vielen Details – vom Fälligkeitsdatum bis hin zu speziell erstellten Tags für die Abrechnung. Diese Infos helfen dir und deinem Team, den Überblick zu behalten. Bisher hast du zusätzliche Informationen über Tags, Kommentare oder individuelle Beschreibungen hinzugefügt, um die Standard-Felder in awork zu ergänzen. Das war zwar ein cleverer Workaround, wurde aber bei vielen Aufgaben schnell unübersichtlich und stieß an seine Grenzen.
Mit den Eigenen Feldern in awork kannst du individuelle Aufgabendetails für deinen Workspace vordefinieren und direkt in Projektaufgaben nutzen. So bleiben alle Details einheitlich, ohne auf Flexibilität zu verzichten. Du kannst aus verschiedenen Feldtypen wie Text, Zahl, Checkbox, Auswahl, Datum oder User wählen. Eigene Felder werden für den gesamten Workspace erstellt und können flexibel in einzelnen Projekten aktiviert oder deaktiviert werden – so bleibt dein Projekte immer übersichtlich und enthält keine überflüssigen Infos.
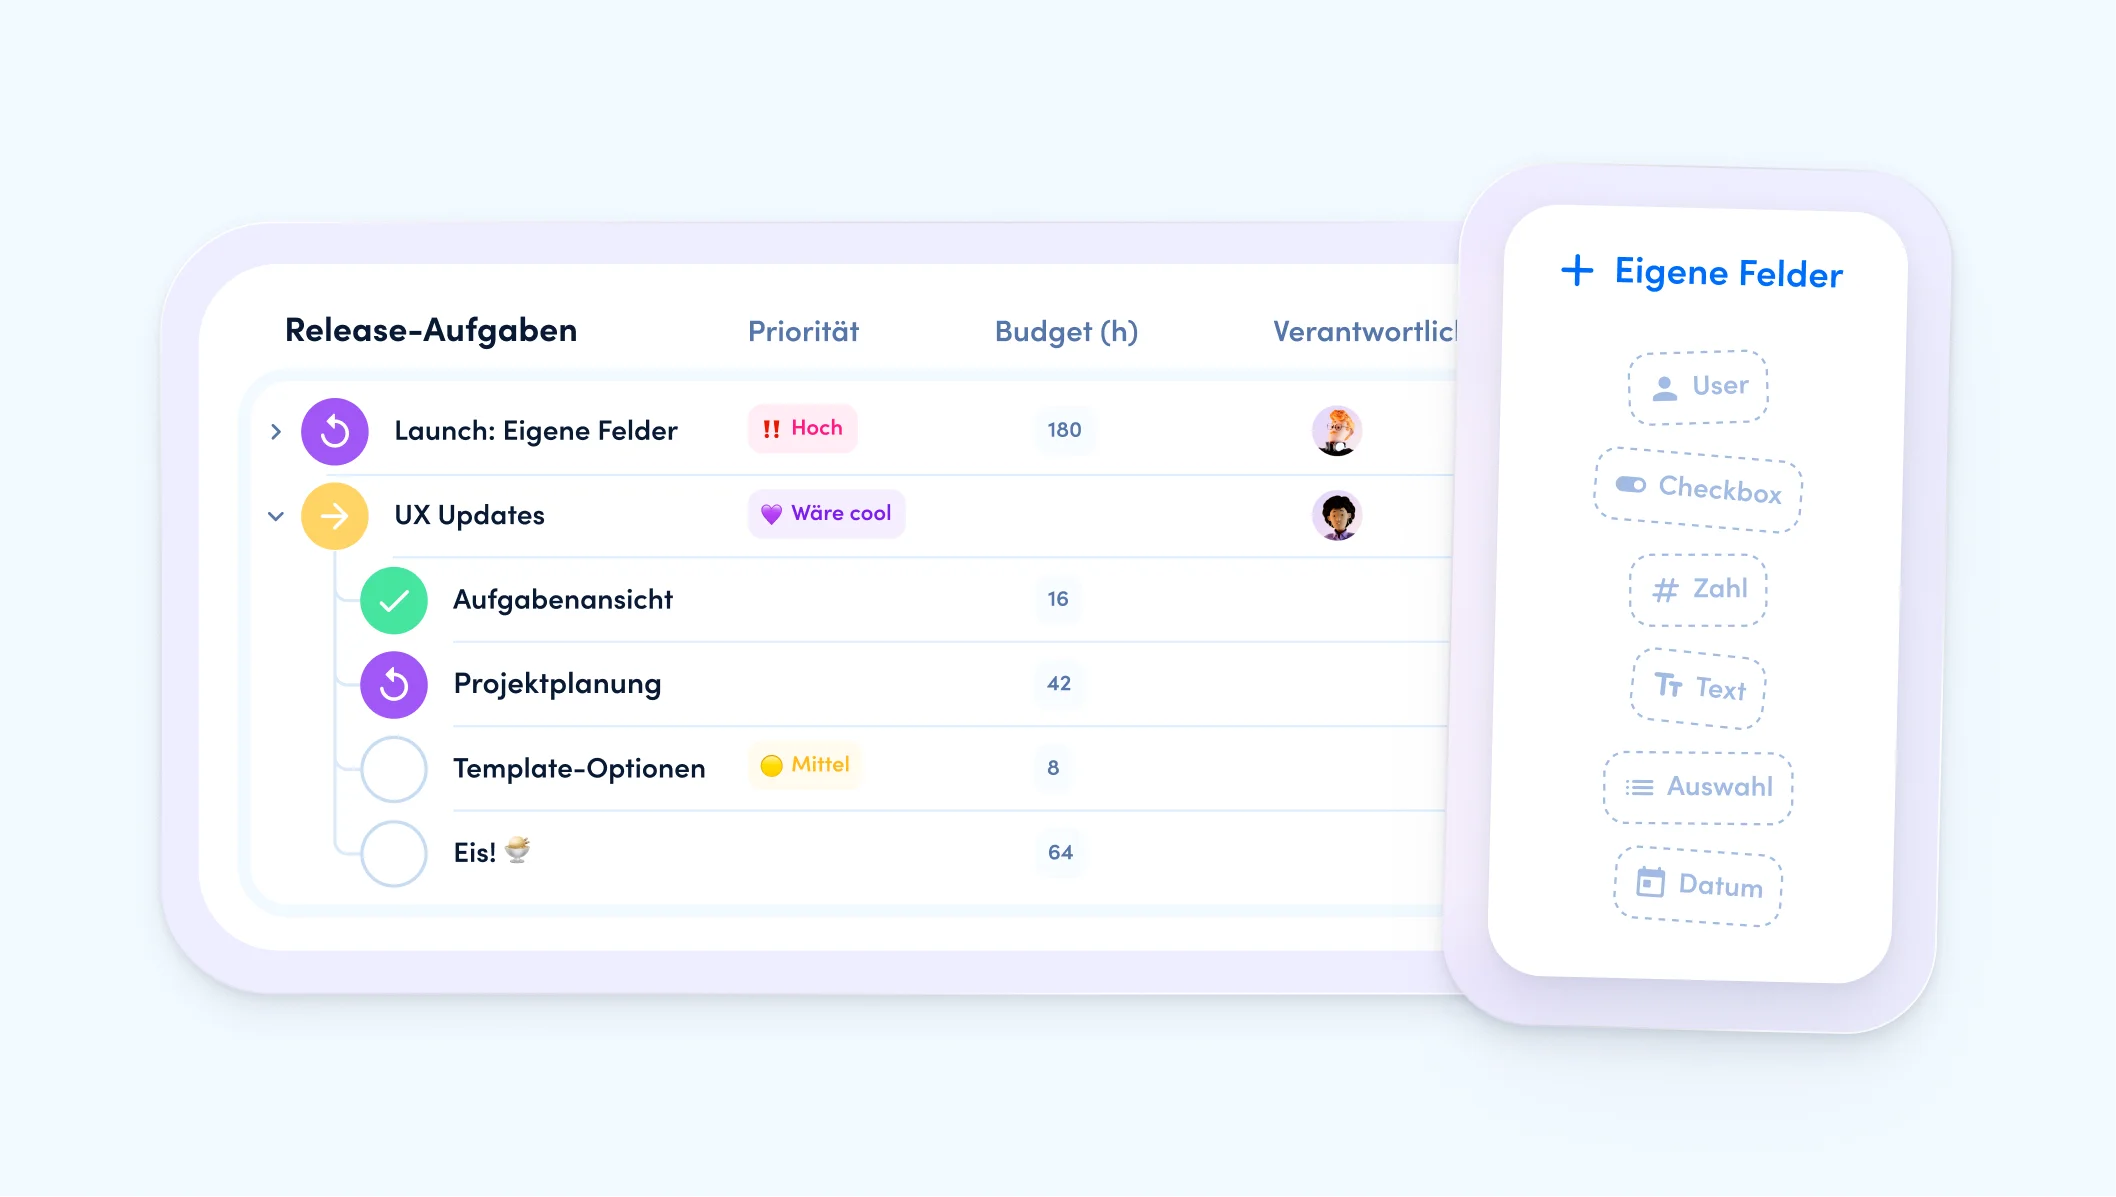
🔎 Um dir schon mal einen Einblick zu geben und dir die Vorbereitung zu erleichtern, zeigen wir dir hier, wie Eigene Felder in awork funktionieren:
- Felder erstellen (Admin):
- Als Admin findest du in den Workspace-Einstellungen den neuen Tab Eigene Felder
- Dort kannst du Felder erstellen, bearbeiten und löschen
- Um ein neues Feld zu erstellen, klickst du auf das Plus-Symbol
- Vergib einen Namen und wähle den passenden Feldtyp (Text, Zahl, Checkbox, Auswahl, Datum oder User)
- Nach dem Speichern steht das Feld zur Aktivierung in allen Projekten des Workspaces bereit
- Felder aktivieren (Projektleitung):
- In den Projekteinstellungen findest du alle verfügbaren Eigenen Felder
- Als User mit Schreibrechten in einem Projekt kannst du hier die Felder aktivieren, die für das Projekt benötigt werden
- Nach der Aktivierung stehen die Felder für alle User in den Projektaufgaben zur Verfügung
- Felder nutzen (User):
- Die aktivierten Felder können nun in den Projektaufgaben als Details, Spalten in den Aufgabenlisten oder Filterkriterium genutzt werden
- Als User mit Schreibrechten auf die Aufgabe kannst du die Eigenen Felder ausfüllen.
- Als User mit Leserechten kannst du die Felder sehen, aber nicht bearbeiten
[.b-important-block]Um Eigene Felder nutzen zu können, benötigst du einen Business- oder Enterprise-Account. Die Anzahl der Felder ist im Business-Plan auf 12 begrenzt und im Enterprise-Plan unbegrenzt.[.b-important-block]
[$tag]💡Gut zu wissen[$tag]
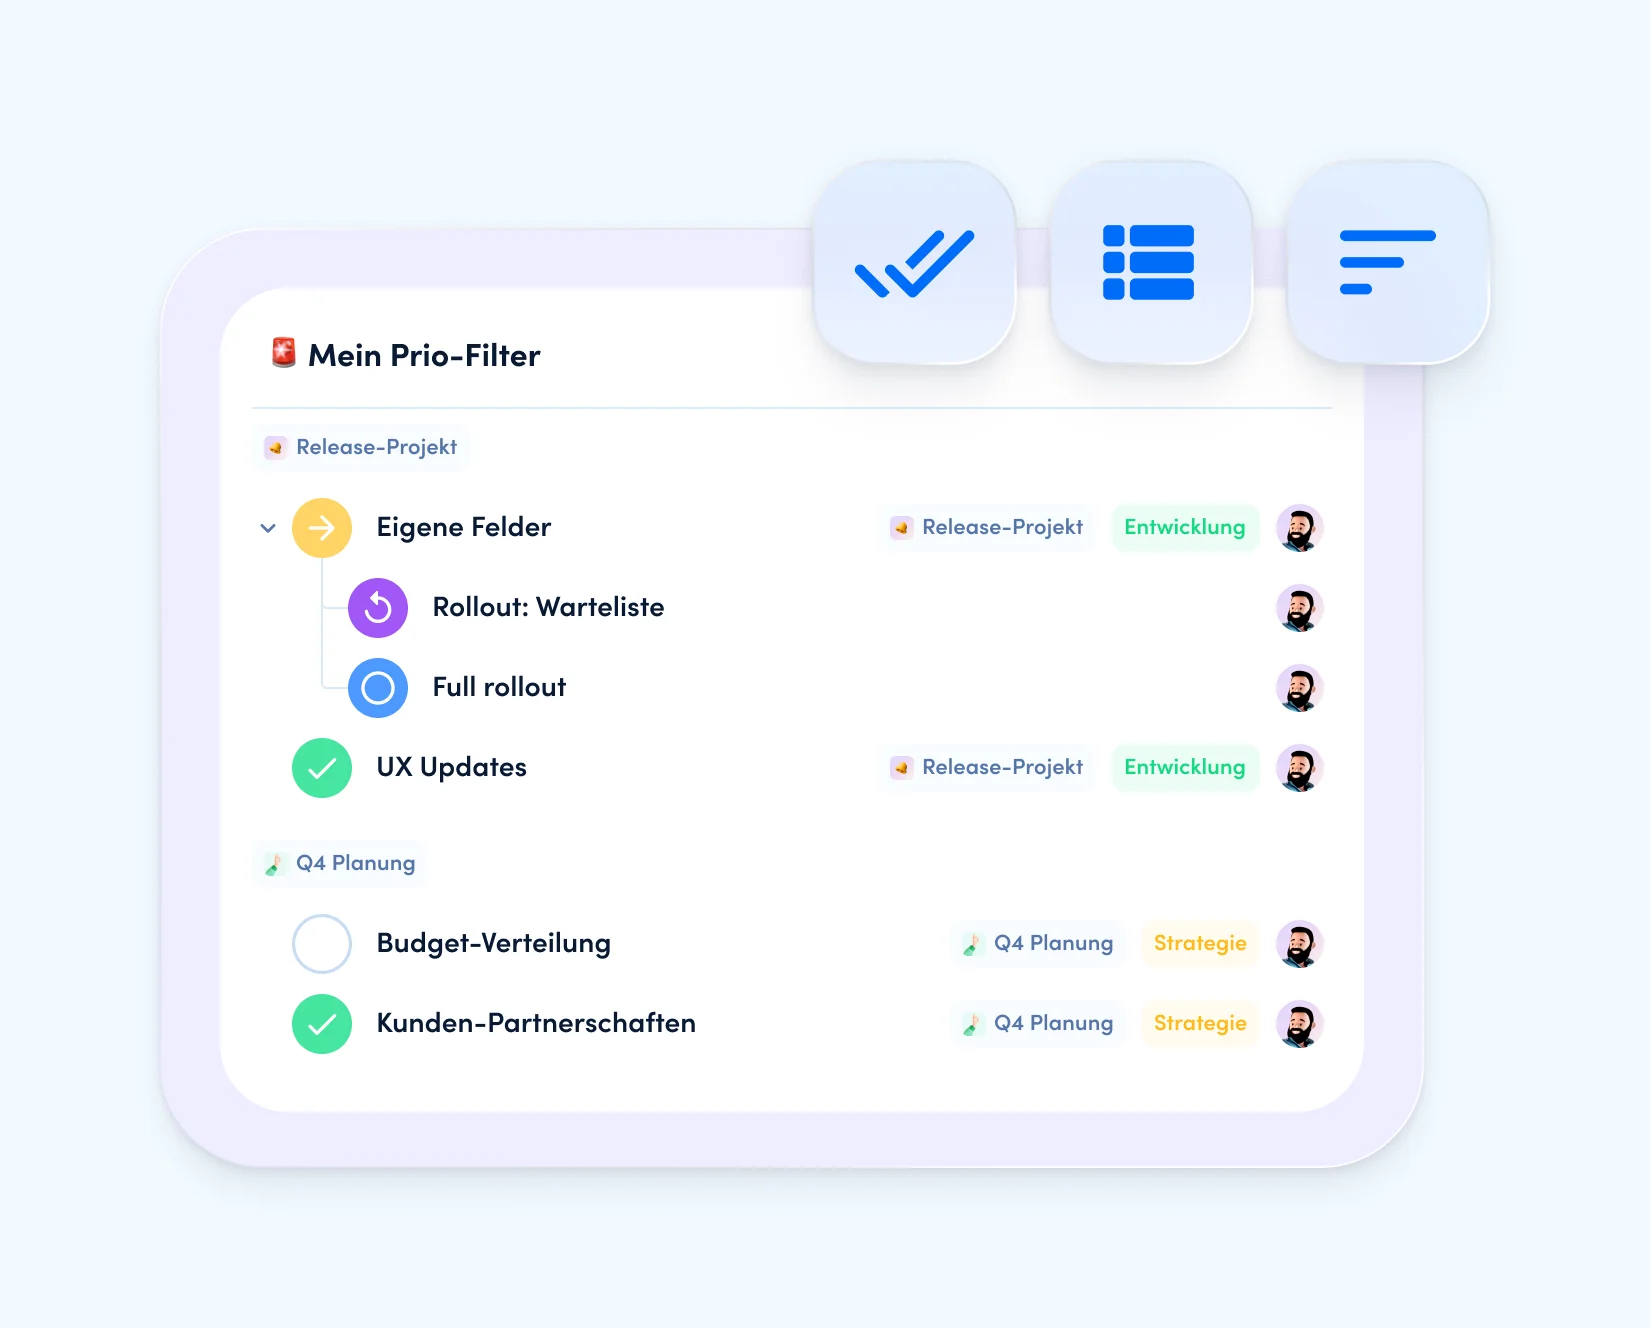
Alle workspaceweit angelegten Felder kannst du dir als Spalte in den Aufgabenlisten anzeigen lassen und als Kriterium bei der Erstellung eines Aufgabenfilters verwenden.
📌 Beispiel: Hast du eine eigene Priorisierung für deine Aufgaben als Feld angelegt und alle superhohen Prios als „Hohe Prio“ gekennzeichnet? Dann kannst du ganz einfach einen Aufgabenfilter erstellen und unter Aufgaben-Filter das Kriterium „Hohe Prio“ auswählen. Der Filter zeigt dir dann alle Aufgaben mit deiner individuell eingestellten „Hohen Prio“ an. So behältst du immer den Überblick, den du gerade brauchst.
Wenn du ein Eigenes Feld nicht mehr benötigst oder den Feldtyp ändern möchtest, kannst du das ganz einfach im Tab Eigene Felder über das Aktionsmenü erledigen. Achte aber darauf, dass dies Auswirkungen auf deine bestehenden Felddaten haben kann.
Nutze die neue Flexibilität in awork und mach deine Workflows noch effizienter! Bist du auf der Suche nach Ideen, wie du Eigene Felder optimal einsetzen kannst? Schau dir unsere Use-Cases an und lass dich inspirieren! ✨
[.b-button-primary]Use-Cases lesen ✨[.b-button-primary]
Features für die optimale Projektplanung
Sortiere deine Projektübersicht
Für eine effiziente Planung in deinem Team brauchst du den perfekten Überblick über eure aktuellen Projekte. Besonders bei großen Teams mit vielen parallelen Projekten kann es eine echte Herausforderung sein, den Überblick zu behalten. Mit der neuen Sortierfunktion in awork kannst du deine Projektübersicht jetzt noch einfacher an deine Bedürfnisse anpassen. So erkennst du auf einen Blick, was wirklich relevant ist, und findest schnell die richtigen Projekte.
Sortiere deine Projektübersicht jetzt nach:
- Enddatum
- Startdatum
- Name
- Kunde
- Budget
- Aufgaben-Fortschritt
- Zeit-Fortschritt
- Status
📌 Beispiel: Willst du schnell sehen, wie deine aktuellen Kundenprojekte laufen und wo ihr vielleicht hinterherhinkt? Gruppiere deine Projektübersicht nach Kunde und sortiere nach Aufgabenfortschritt. So erkennst du sofort, bei welchem Kundenprojekt es noch Luft nach oben gibt.
Verschiebe ganze Projekte in der Timeline
Projektplanung kann unvorhersehbar sein – du hast den perfekten Plan in awork erstellt, alle Aufgaben eingeplant und Start- sowie Enddaten festgelegt. Doch dann kommt etwas dazwischen: ein unerwarteter Kundenauftrag, ein Krankheitsfall im Team oder andere unvorhersehbare Faktoren. Plötzlich muss dein Projekt verschoben werden.
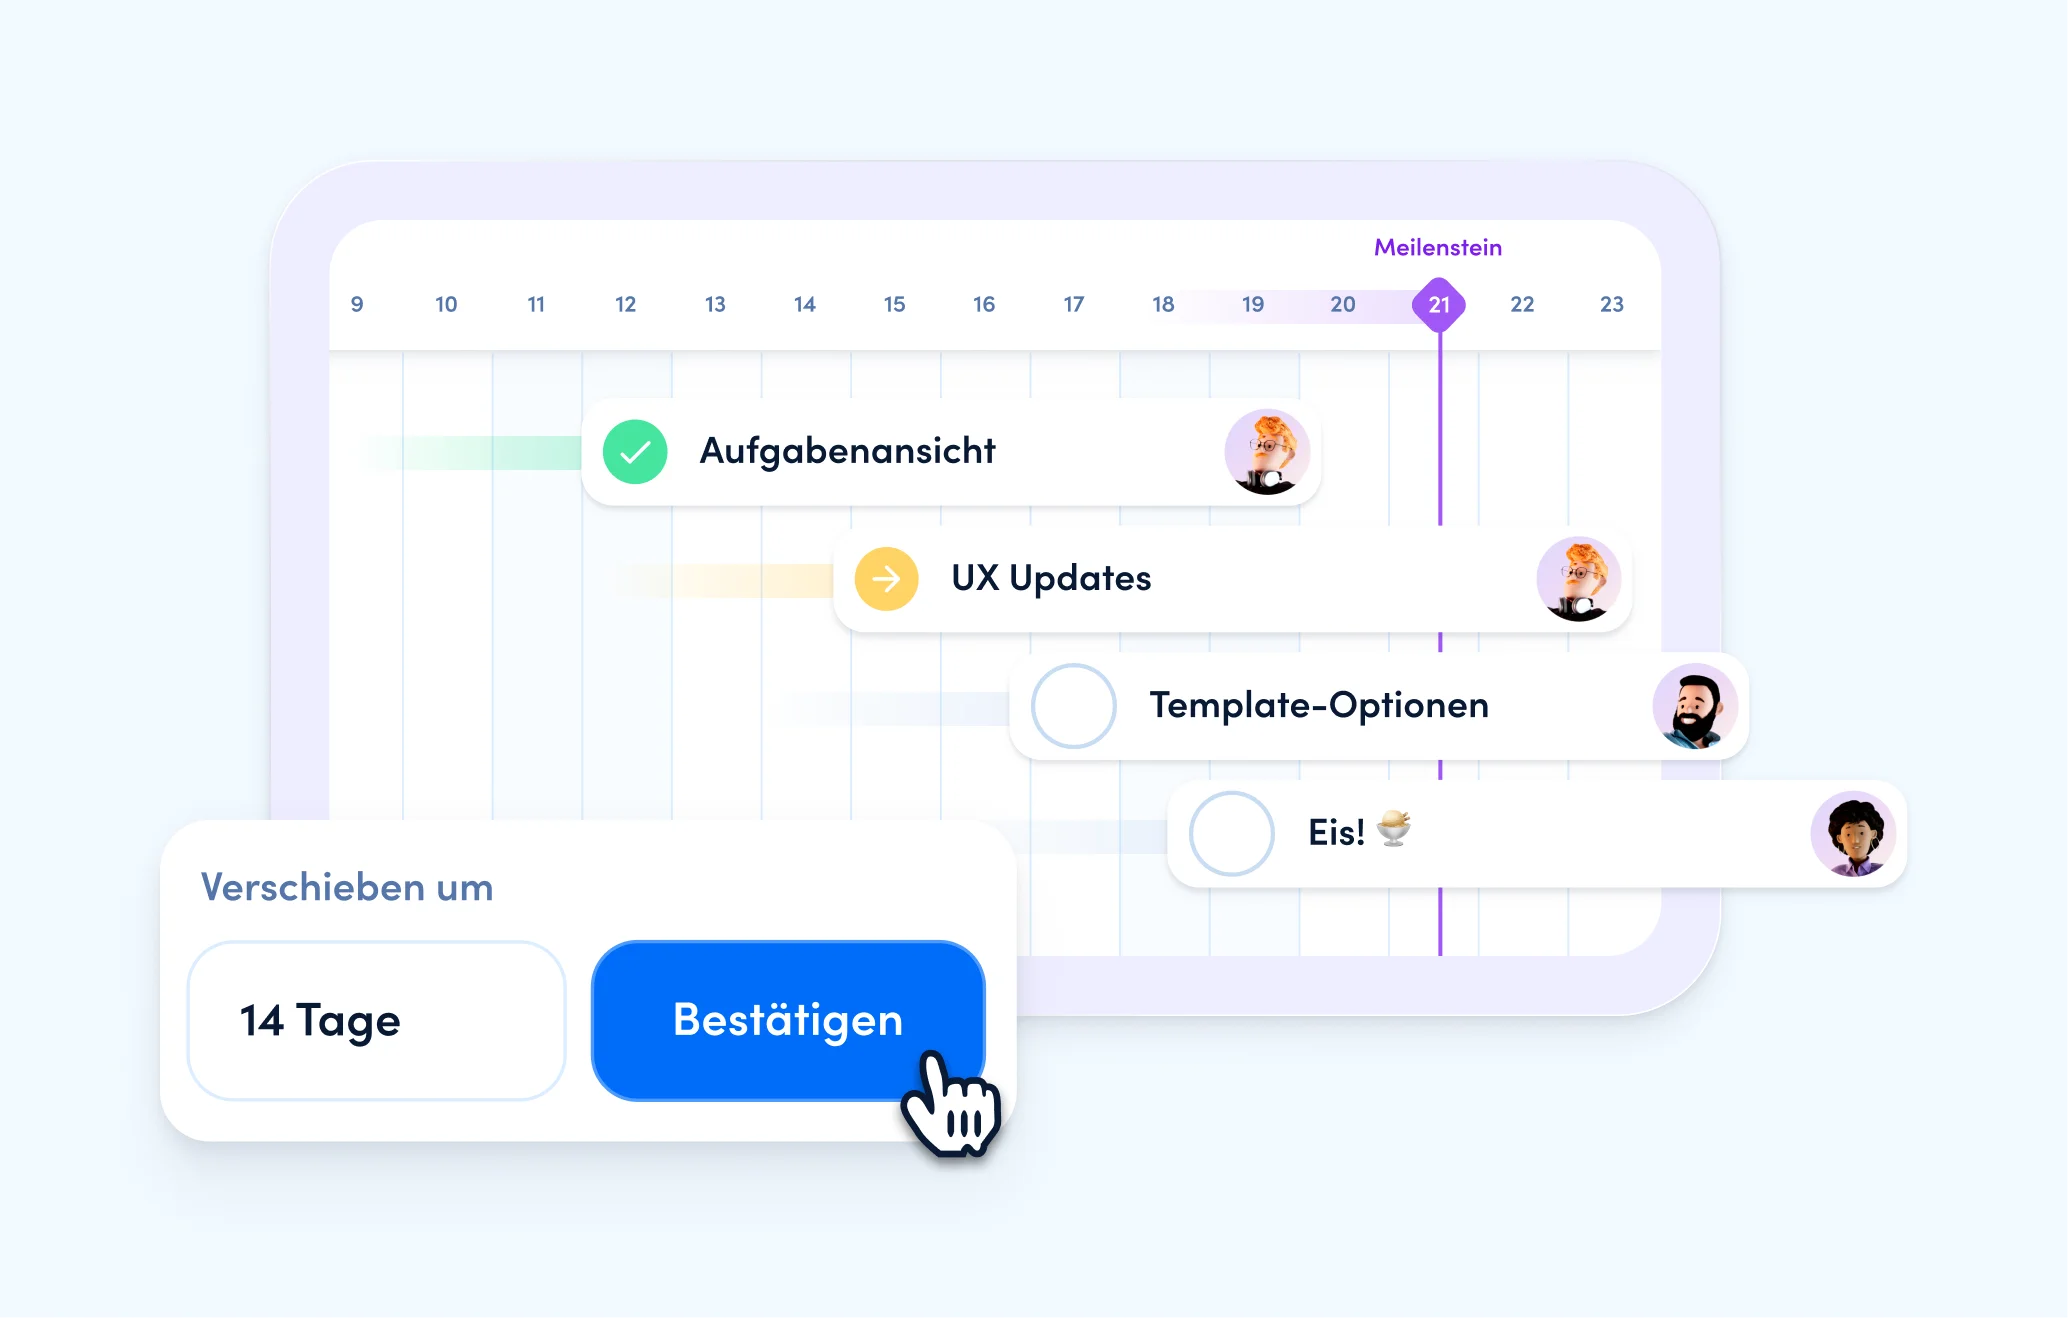
Mit unserer neuen Funktion kannst du jetzt ein gesamtes Projekt auf einmal um eine bestimmte Anzahl von Tagen verschieben. Nehmen wir an, du hast das Kundenprojekt „Website-Relaunch“ für dein Team eingerichtet, und der Start ist schon in einer Woche. Doch du benötigst noch das finale Go und wichtige Informationen von der Kundin – die ist aber erst in drei Wochen aus dem Urlaub zurück. Kein Problem! Geh einfach in die Projektdetails, klicke auf das Aktionsmenü und verschiebe das gesamte Projekt samt aller Deadlines um drei Wochen.
Du kannst auch nur einzelne Aufgabenlisten oder spezifische Aufgaben verschieben. Angenommen, die Grafikerin deines Teams ist spontan erkrankt, und du musst ihre Aufgabenliste um sieben Tage verschieben. In der Aufgabenliste kannst du einfach die betreffenden Aufgaben oder Listen auswählen und ebenfalls verschieben. So passt du deine Planung schnell und flexibel an neue Gegebenheiten an – ganz ohne manuellen Aufwand.
Behalte deinen Projektfortschritt im Blick mit dem neuen Fortschrittsbalken
Ab sofort hast du einen praktischen Überblick über deinen Fortschritt direkt auf Projektebene! Die Fortschrittsbalken sind in den Projektdetails integriert, sodass du auf einen Blick sehen kannst, wie es um den Fortschritt deines Fälligkeitsdatums, Budgets, erfassten Zeitaufwands und deiner Aufgaben steht. So sieht jeder sofort, wo das Projekt gerade steht – ob bei der Überprüfung des Projektstatus oder beim Verfolgen der Zeitaufwände.
“Geplant vs. erfasst”-Ansicht jetzt auch für Kund*innen
Öffnest du einen in awork angelegten Kunden, siehst du alle zugehörigen Projekte und die darauf erfassten Zeiten. Um dir die Planung und Auswertung von Kundenprojekten noch einfacher zu machen, gibt es jetzt auch die „Geplant vs. erfasst“-Ansicht direkt im Zeiten-Tab deiner Kunden – genau wie bei Projekten und Usern. Diese Übersicht bietet dir detaillierte Einblicke in die Zeiten einzelner Aufgabenlisten und Aufgaben deiner Kundenprojekte. So behältst du den Überblick über die tatsächlichen Aufwände und kannst eure Ressourcen für zukünftige Kundenprojekte noch präziser steuern.
Ändere die Tätigkeit direkt in den Aufgabendetails
Um die Tätigkeit zu ändern, musstest du bisher in die Einstellungen einer Aufgabe gehen. Ab sofort kannst du das direkt in den Aufgabendetails erledigen! Spare dir den Umweg und aktualisiere die Tätigkeit einfach dort, wo du gerade arbeitest.
Bessere Übersicht für dein Dashboard
Individualisiere deine Ansicht der Aufgabenlisten
Das Dashboard ist dein digitaler Schreibtisch im Projektmanagement – perfekt, um den Überblick über dein Daily Business zu behalten. Besonders das Aufgaben-Widget ist ein echtes Power-Tool, das dir zeigt, was bei dir (oder deinem Team) als nächstes ansteht.
Jetzt wird das Arbeiten mit Aufgabenlisten im Dashboard noch übersichtlicher:
- Sortiere die Aufgaben in deinem Widget nach deinen Fälligkeiten, Namen, Status und vieles mehr
- Gruppiere Aufgaben nach Kategorien, Projekten, Fälligkeit und mehr
- Blende erledigte Aufgaben ganz einfach ein oder aus und halte deine Ansicht stets aktuell
So behältst du immer den klaren Durchblick über deine To-Dos und kannst deinen Arbeitstag noch effizienter gestalten.
Behalte die Abwesenheiten deines Teams im Widget im Blick
Für eine präzise Planung deiner Team-Kapa ist es entscheidend, stets einen klaren Überblick über die Abwesenheiten deines Teams zu haben. Um dir das noch einfacher zu machen, kannst du jetzt ein Abwesenheiten-Widget direkt für dein gesamtes Team auf deinem Dashboard einrichten. Du kannst gezielt auswählen, welche Teams angezeigt werden sollen, sodass du nur die relevanten Abwesenheiten siehst und nicht von unnötigen Informationen überwältigt wirst. Darüber hinaus kannst du sogar mehrere Abwesenheits-Widgets in deinem Dashboard anlegen – jeweils für verschiedene Teams. Das erleichtert die Vergleichbarkeit und hilft dir, potenzielle Engpässe auf einen Blick zu erkennen.
[.b-important-block]Abwesenheiten und Teams sind erst ab dem Business Plan verfügbar[.b-important-block]
[$tag]💡 Gut zu wissen[$tag]
Mehr Inhalte und Details für Vorlagen
Bearbeite Tags in Vorlagen
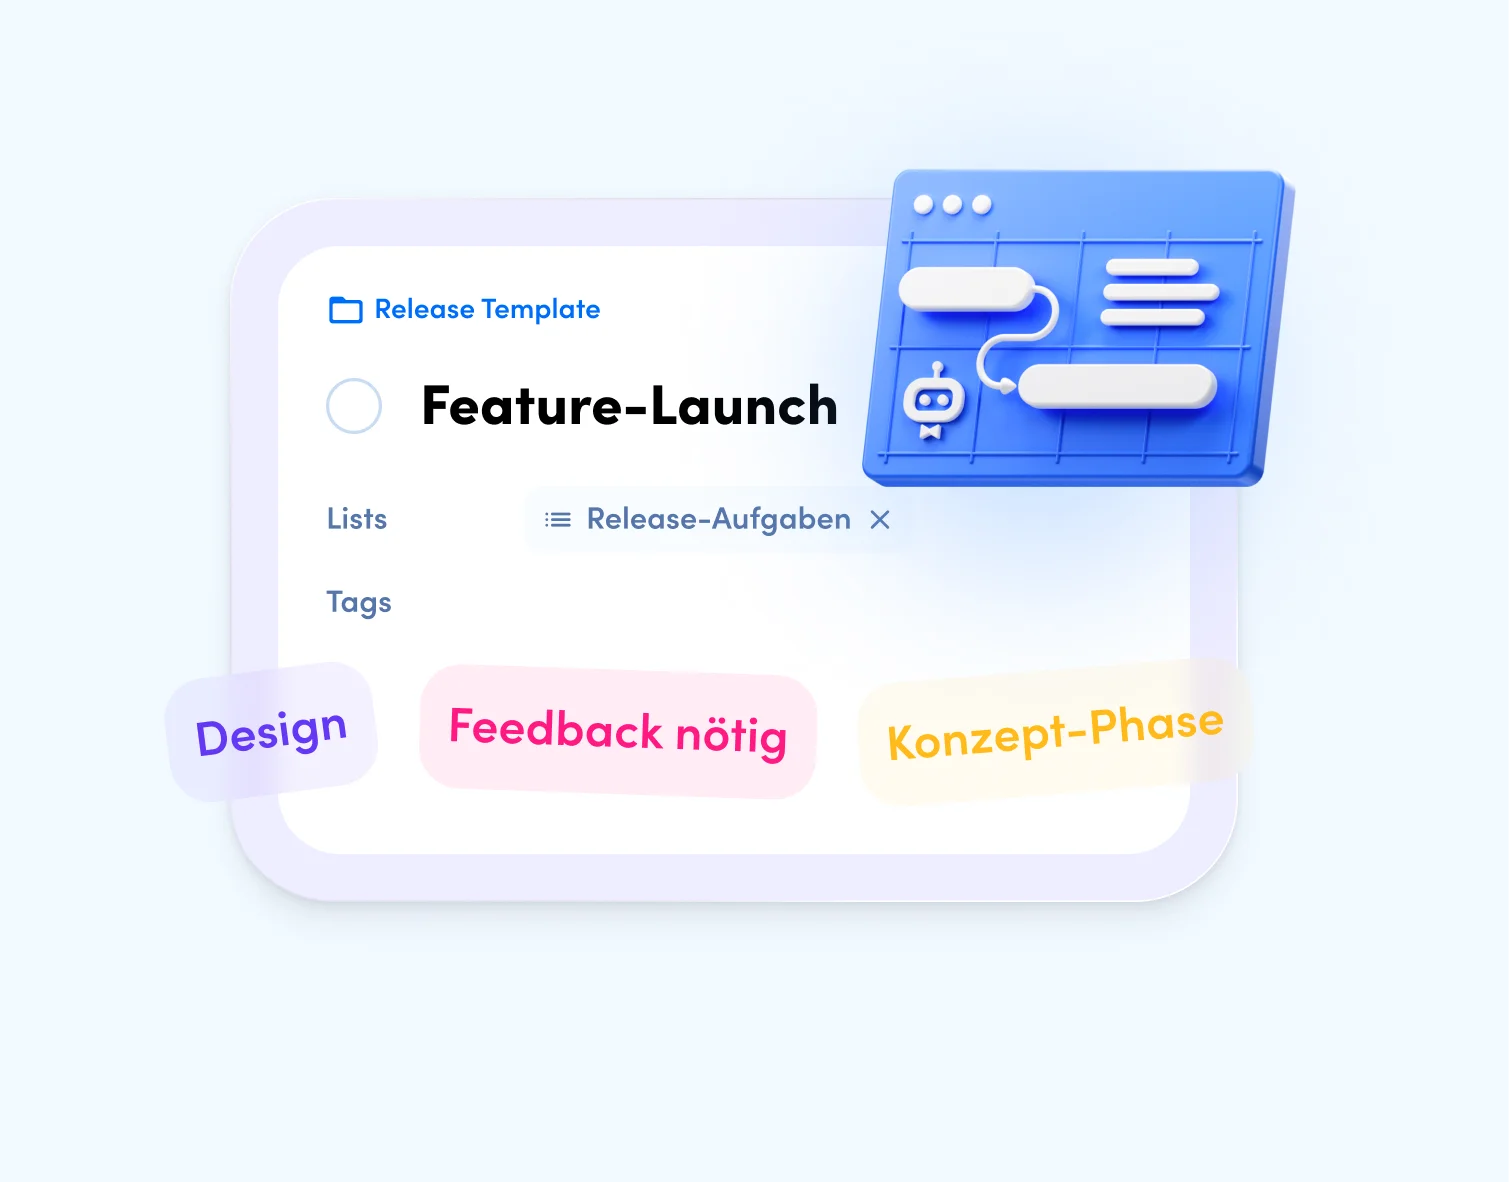
Ab sofort kannst du beim Erstellen von Vorlagen deine Tags automatisch übernehmen und sie anschließend nach Belieben anpassen. Das bringt dich einen Schritt näher daran, die Vorlagen perfekt für dein Team vorzubereiten.
Start-und Enddatum automatisch einstellen
Du hast jede Menge Zeit und Mühe in die Erstellung eines Projekts gesteckt und dann gemerkt – das wäre die perfekte Vorlage für zukünftige Projekte! Gut, dass das bei awork so einfach geht. Bisher gab es nur einen kleinen Haken: Die Start- und Enddaten deiner Aufgaben wurden bei der Erstellung einer Vorlage nicht berücksichtigt. Du musstest sie nach dem Erstellen der Vorlage manuell in den Aufgaben anpassen.
Aber keine Sorge, das gehört jetzt der Vergangenheit an! Mit der neuen Funktion kannst du beim Erstellen einer Vorlage festlegen, dass die Start- und Enddaten direkt als relative Daten übernommen werden.
📌 Beispiel: Du hast in deinem Projekt die Aufgabe „Konzept erstellen“, die eine Woche nach Projektstart beginnt. Wenn du dieses Projekt in eine Vorlage umwandelst, wird das Startdatum automatisch als relatives Datum übernommen. Das bedeutet, dass bei der Erstellung eines neuen Projekts aus dieser Vorlage die Aufgabe „Konzept erstellen“ automatisch eine Woche nach dem Projektstart beginnt.
Sortiere deine Vorlagen alphabetisch und finde sie im Handumdrehen
Du findest die richtige Vorlage nicht, weil es schon zu viele gibt? Das ist jetzt Geschichte! Mit der neuen Suchfunktion in der Vorlagenübersicht kannst du ganz einfach nach Vorlagen suchen. Zusätzlich werden sie dir automatisch alphabetisch sortiert angezeigt. So wird das Suchen und Finden von Vorlagen zum Kinderspiel!
Nutze awork jetzt noch intuitiver
Passe die Split-View deiner Aufgaben an
Gestalte deine Aufgabenübersicht jetzt genau so, wie du sie für deine Arbeit brauchst. Mit der anpassbaren Split-View kannst du gleichzeitig an Aufgaben arbeiten und behältst trotzdem die volle Übersicht über deine Aufgabenlisten.
📌 Beispiel: Stell dir vor, du arbeitest in einem Projekt an einer Kundenkampagne und erstellst hierfür die Aufgabe „Designkonzept“. Du öffnest sie und nutzt die anpassbare Split-View, um die Detailansicht zu minimieren und gleichzeitig den Überblick über alle Aufgabenlisten und deren Details zu behalten. So hast du wichtige Informationen wie „User“, „Prio“ und „Geplanter Aufwand“ stets im Blick. Mit dieser Ansicht kannst du die Aufgabe gezielt mit Infos und Details ergänzen, ohne das Gesamtbild aus den Augen zu verlieren.
Schnell Aufgaben in ein anderes Projekt verschieben
Hast du eine Aufgabe in einem Projekt geplant und festgestellt, dass sie besser in einem anderen Projekt aufgehoben wäre? Jetzt gibt es einen ganz einfachen Weg, Aufgaben in ein anderes Projekt zu verschieben! Klicke einfach auf das Aktionsmenü der Aufgabe und wähle Verschieben ins Projekt. Anschließend wählst du die gewünschte Liste im neuen Projekt und den passenden Status aus – und schon ist die Aufgabe an ihrem neuen Platz. Das funktioniert auch für mehrere Aufgaben gleichzeitig oder ganze Aufgabenlisten über die Mehrfachauswahl.
Überblicke alle externen User in einer Übersicht
Damit du deine externen User im Workspace immer im Blick hast, haben wir eine neue Übersicht in deinen Einstellungen eingebaut. Hier siehst du jetzt auf einen Blick alle externen User, die an Projekten deiner Agentur beteiligt sind. So kannst du:
- Externe direkt aus Projekten entfernen
- Benutzer nach Projekten oder anderen Kriterien gruppieren und sortieren
Mit dieser Übersicht behältst du die Kontrolle darüber, welche Externen an deinen Projekten beteiligt sind und kannst alles ganz einfach an einem Ort managen.
Mix dir dein Lieblingseis!
Mit dem Custom-Ice-Release haben wir es geschafft, für jeden Geschmack etwas Passendes zu bieten. Ob es darum geht, deine Planung in awork zu optimieren oder die Arbeit im Dashboard zu vereinfachen – dieser Release erfüllt einige der am häufigsten geäußerten Wünsche unserer User. War auch für dich etwas dabei? Dann probier es doch gleich mal aus!
[.b-button-primary]Jetzt ausprobieren![.b-button-primary]


